Left handed guitar lessons for Beginners
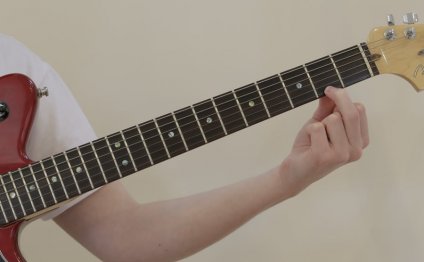
There are many things about your left hand that you should be aware of when you are playing guitar. Relaxing and finger placement are the two main things that we will focus on during this lesson. Many guitarists have their own idea of what proper technique is. The ideas in this lesson are not necessarily strict rules for technique, but they are good guidelines for developing your playing and keeping yourself injury free. At the end of this lesson, we will give you an exercise that will help you to focus on good left hand technique.
Being relaxed is something that is very important for you to be aware of. If you are practicing the guitar and you start to feel any excessive tension in your fingers, hands, arms, back or neck, you should stop and relax. Doing some stretches helps too. Tension can not only be hazardous to your health, but it can also slow down your playing. A relaxed hand can move much more quickly and efficiently than a tense hand.
When you are playing the guitar, it is very important that your fingers on your left hand have proper finger placement. Good finger placement is right behind the fret. If you are playing a note and notice that your finger is in the middle or toward the back of the fret, you should move it up until it is pretty close to the fret. This will make it easier for you to play clean and clear notes. You should use your ears to help you with your finger placement too. If you hear some buzzing on a note, check your finger placement. Most of the time a small adjustment will help to clear up some buzzing. Keeping your left thumb right in the middle of the back of the neck is also an important thing to remember. If you remember to do this, you can eliminate some of the tension that bad technique can cause.
There is a very simple exercise that you can use to focus on relaxing and good finger placement. Start out by putting your 1st finger on the 3rd fret of your 6th string. Now stay on the low E string and play the 4th fret with your 2nd finger. Finish your low E string by playing the 5th fret with your 3rd finger. That is the pattern for all six strings. Move to your A string and play the 3rd, 4th and 5th frets with your 1st 2nd and 3rd fingers. Continue this pattern on your D, G, B, and E strings. This may seem like a simple exercise but that is the idea. If you don’t have to remember a scale or a complicated pattern, you will be free to focus on your left hand technique. Start out slowly, get the exercise clean, and then build up your speed. Be sure to use alternate picking throughout the entire exercise.
You really don’t have to spend a lot of time on exercises like this. Five to ten minutes a day should do. It is important that you take exercises like this slowly if you are a beginner. Slow practice in the beginning will pay off with good pain free technique in the future.
YOU MIGHT ALSO LIKE


Share this Post
Related posts
Acoustic Blues Guitar Lessons for Beginners
Every guitar player experiences a major turning point early on in their education. After the requisite, and often times…
Read MoreYouTube Guitar lessons for Beginners acoustic
How to Get the Most from Your YouTube Learning Experience Want to improve your playing, but don’t have money or time to dedicate…
Read More


