
Music Production lessons
 Note: This is primarily a video lesson and you'll get a lot more information from watching the video above. That said, the instructions below will suffice and you should hang on to them for reference.
What You'll Need in This Lesson
If you participated in last week's lesson, you should have all the equipment you need to get started. If not, read last week's lesson first before preceding. We're not going to make equipment recommendations here, but you should know what equipment you're going to need to participate in this lesson:
- Your computer with the DAW software of your choice installed (we'll be using Cubase)
- A digital audio interface (with 48v phantom power) hooked up to your computer
- A microphone connected to your digital audio interface, most likely via XLR cable
- An instrument (e.g. a guitar, your voice, etc.)
- About 20-30 minutes of your time
 Once you've got everything ready, boot up your DAW software and let's get started!
Get to Know Your DAW's Interface.
Interface elements vary between different DAWs, but they embody the same ideas. We'll use Cubase to demonstrate here, but if you're using something else you should find things are pretty similar. Let's take a look at the common parts you'll need to know about.
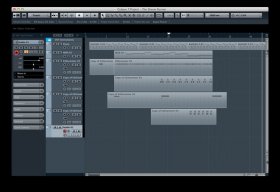
The main project window is where you'll do a lot of your work. This window lets you interact with your instruments and sounds as well as bring up individual channel settings as needed. You can do a lot more, too, but those are the basics.
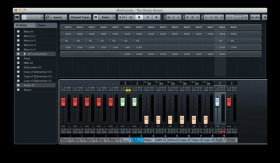
The mixer (in Cubase, this is the first of three mixers) looks like a hardware mixing board in a lot of ways. You can adjust the levels of individual tracks, open their channel settings, monitor the master output, and keep a general eye on what's going on with your mix as it plays.
The transporter does what you probably expect: it transports you around your project. This is where you press record, stop, and play, but also where you can toggle the metronome, set time signatures, loop your project, and get information about where you currently are in your project.
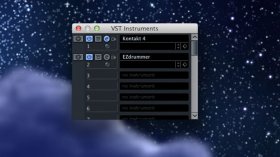
The VST instruments panel isn't something you really need to know about until the next lesson, but it's simply where you add virtual instruments to your project.
When you click the little "e" button next to an audio track you get its channel settings. You can add input (track-specific) and send (multi-track) effects here, use the built-in EQ, and adjust gain.
Those are the main elements of the interface you need to know about. Read on to learn how to set up your first project!
Set Up Your First Project
YOU MIGHT ALSO LIKE
Share this Post
Related posts
Folsom Prison Blues Guitar Lessons
Grab your electric guitar, strap, amp, and your pick and check out this free guitar lesson. This video tutorial will teach…
Read More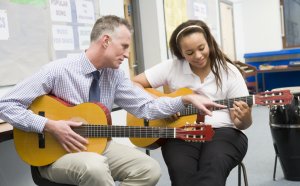
Best acoustic Guitar lessons for Beginners
When you find yourself in the market for a guitar the options can be mind-bending. There are a lot of great guitars out there…
Read Morelatest post
-
 Hawaiian Lap steel Guitar lessons July 29, 2026
 -
 Best online Piano lessons for Adults July 24, 2026
 -
 Guitar lessons Queens NY July 19, 2026
 -
 Music lessons Burlington Ontario July 14, 2026
 -
 Musical Theatre Classes July 9, 2026
 -
 Hindustani Vocal Music lessons July 4, 2026
 -
 Professional Voice lessons June 29, 2026
 -
 First Grade Music lessons June 24, 2026
 -
 Guitar lessons Palo Alto June 19, 2026